
iOS Import Options
momoChef makes it easy to add recipes from anywhere. Import from websites, scan photos, use the share extension, or enter recipes manually.
Import Methods Overview
Choose the import method that works best for your source:
- URL Import: Paste a recipe URL and we'll extract the details
- Share Extension: Send recipes directly from Safari or other apps
- Photo Import: Scan printed recipes, cookbooks, or handwritten cards
- Text Import: Paste recipe text and we'll format it
- File Import: Import from JSON, CSV, or other recipe apps
- Manual Entry: Type recipes from scratch
URL Import
The easiest way to add recipes from your favorite cooking websites.
From Within the App
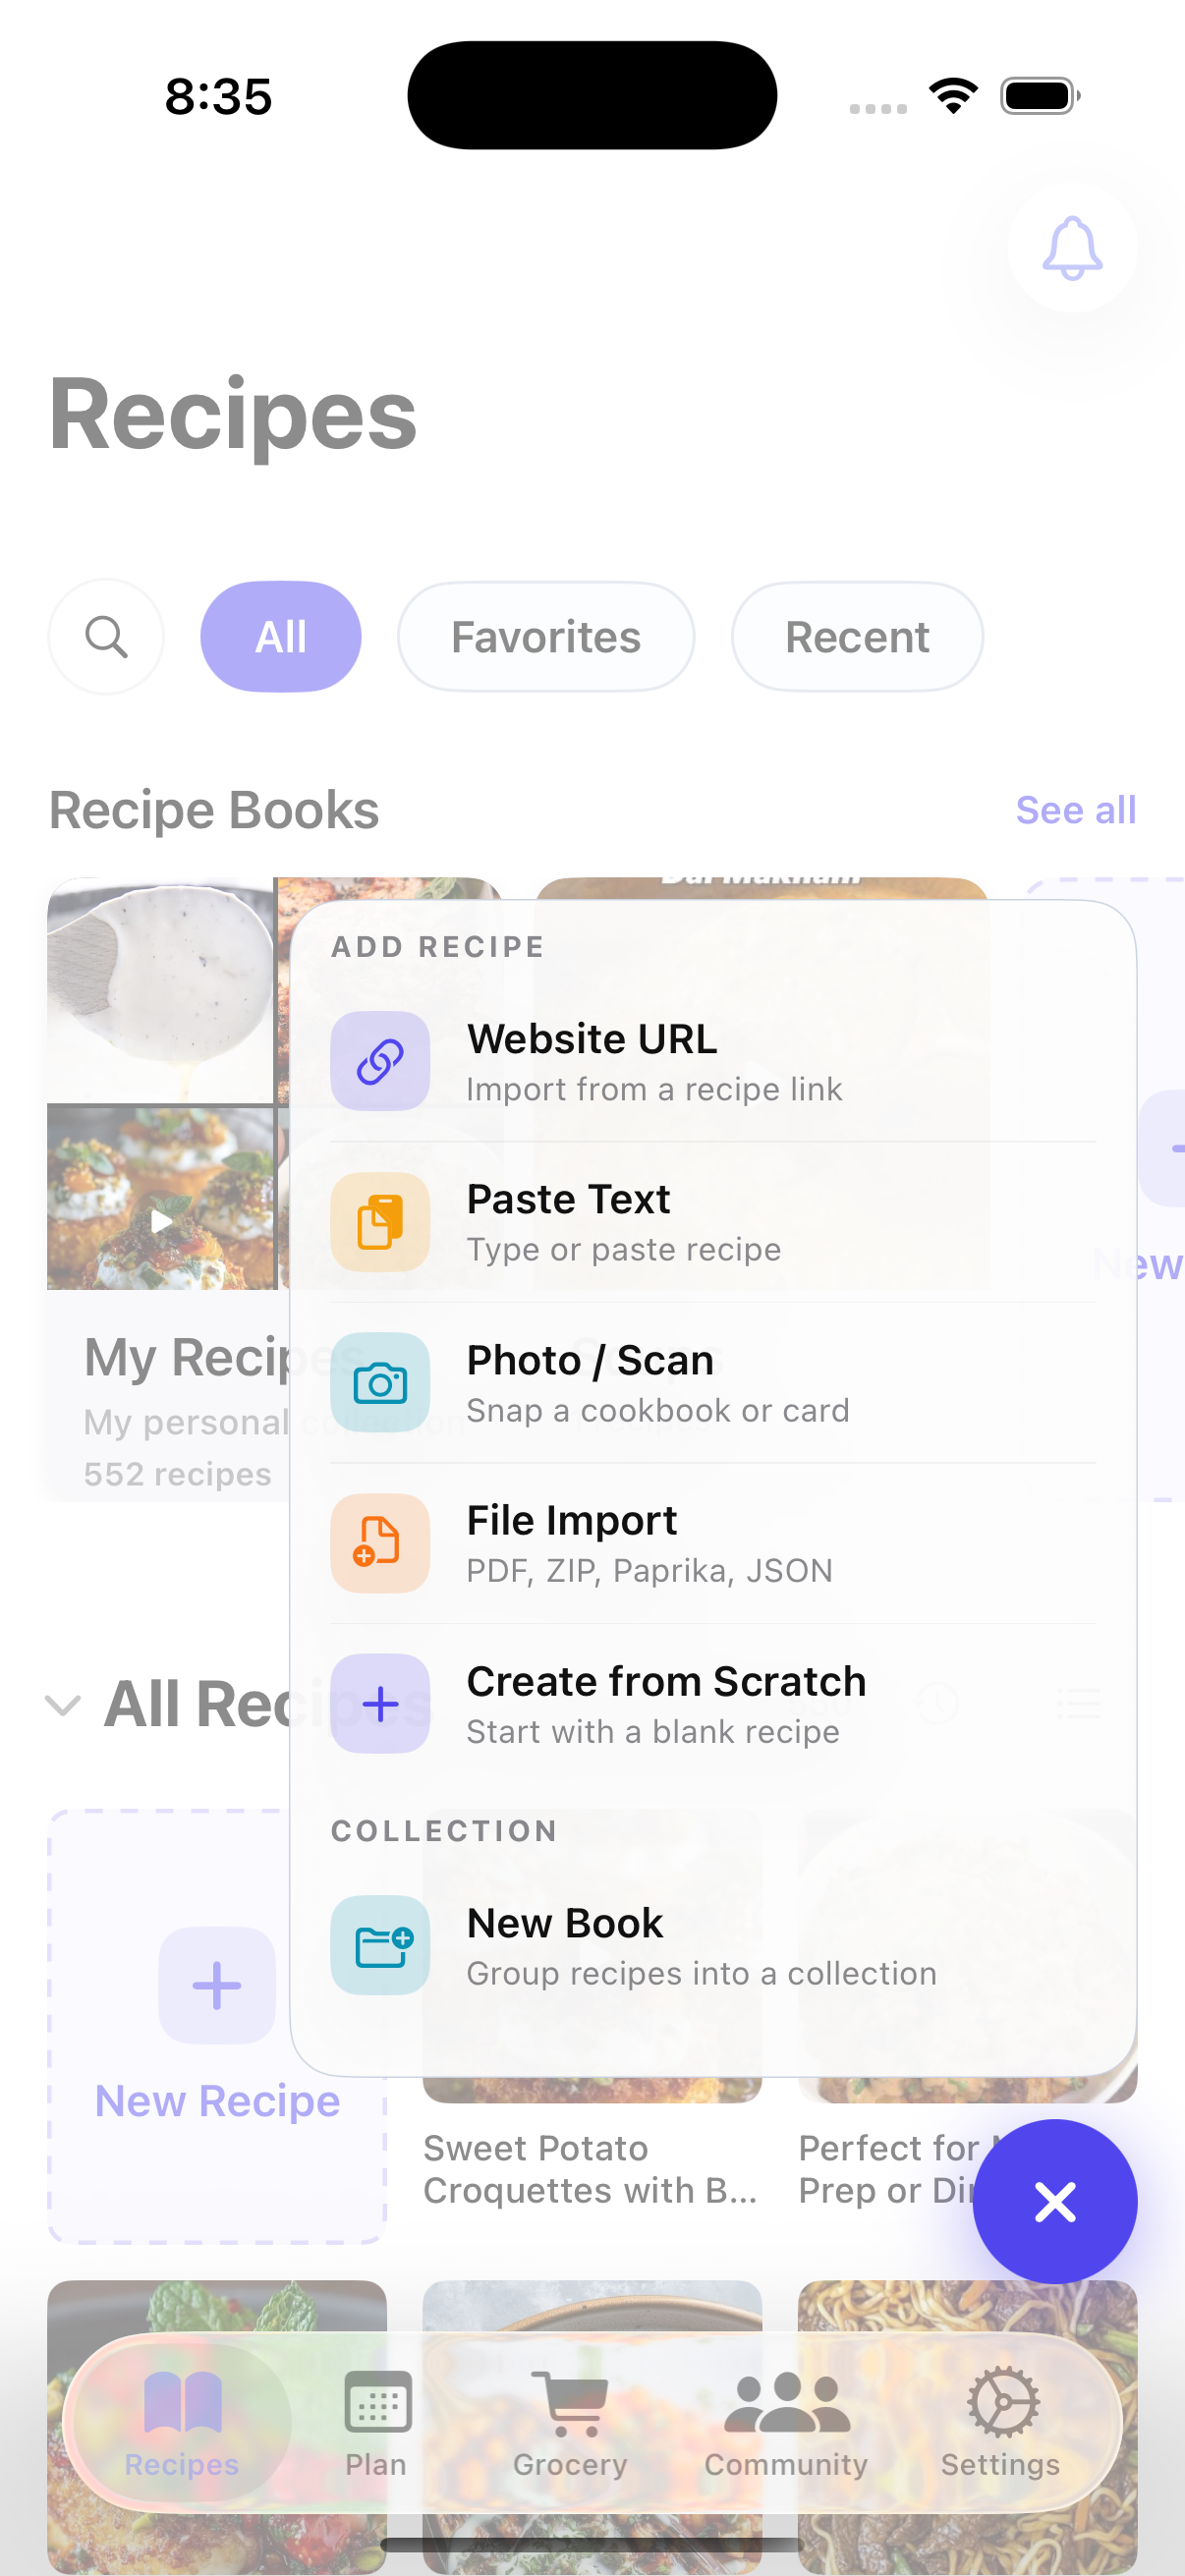
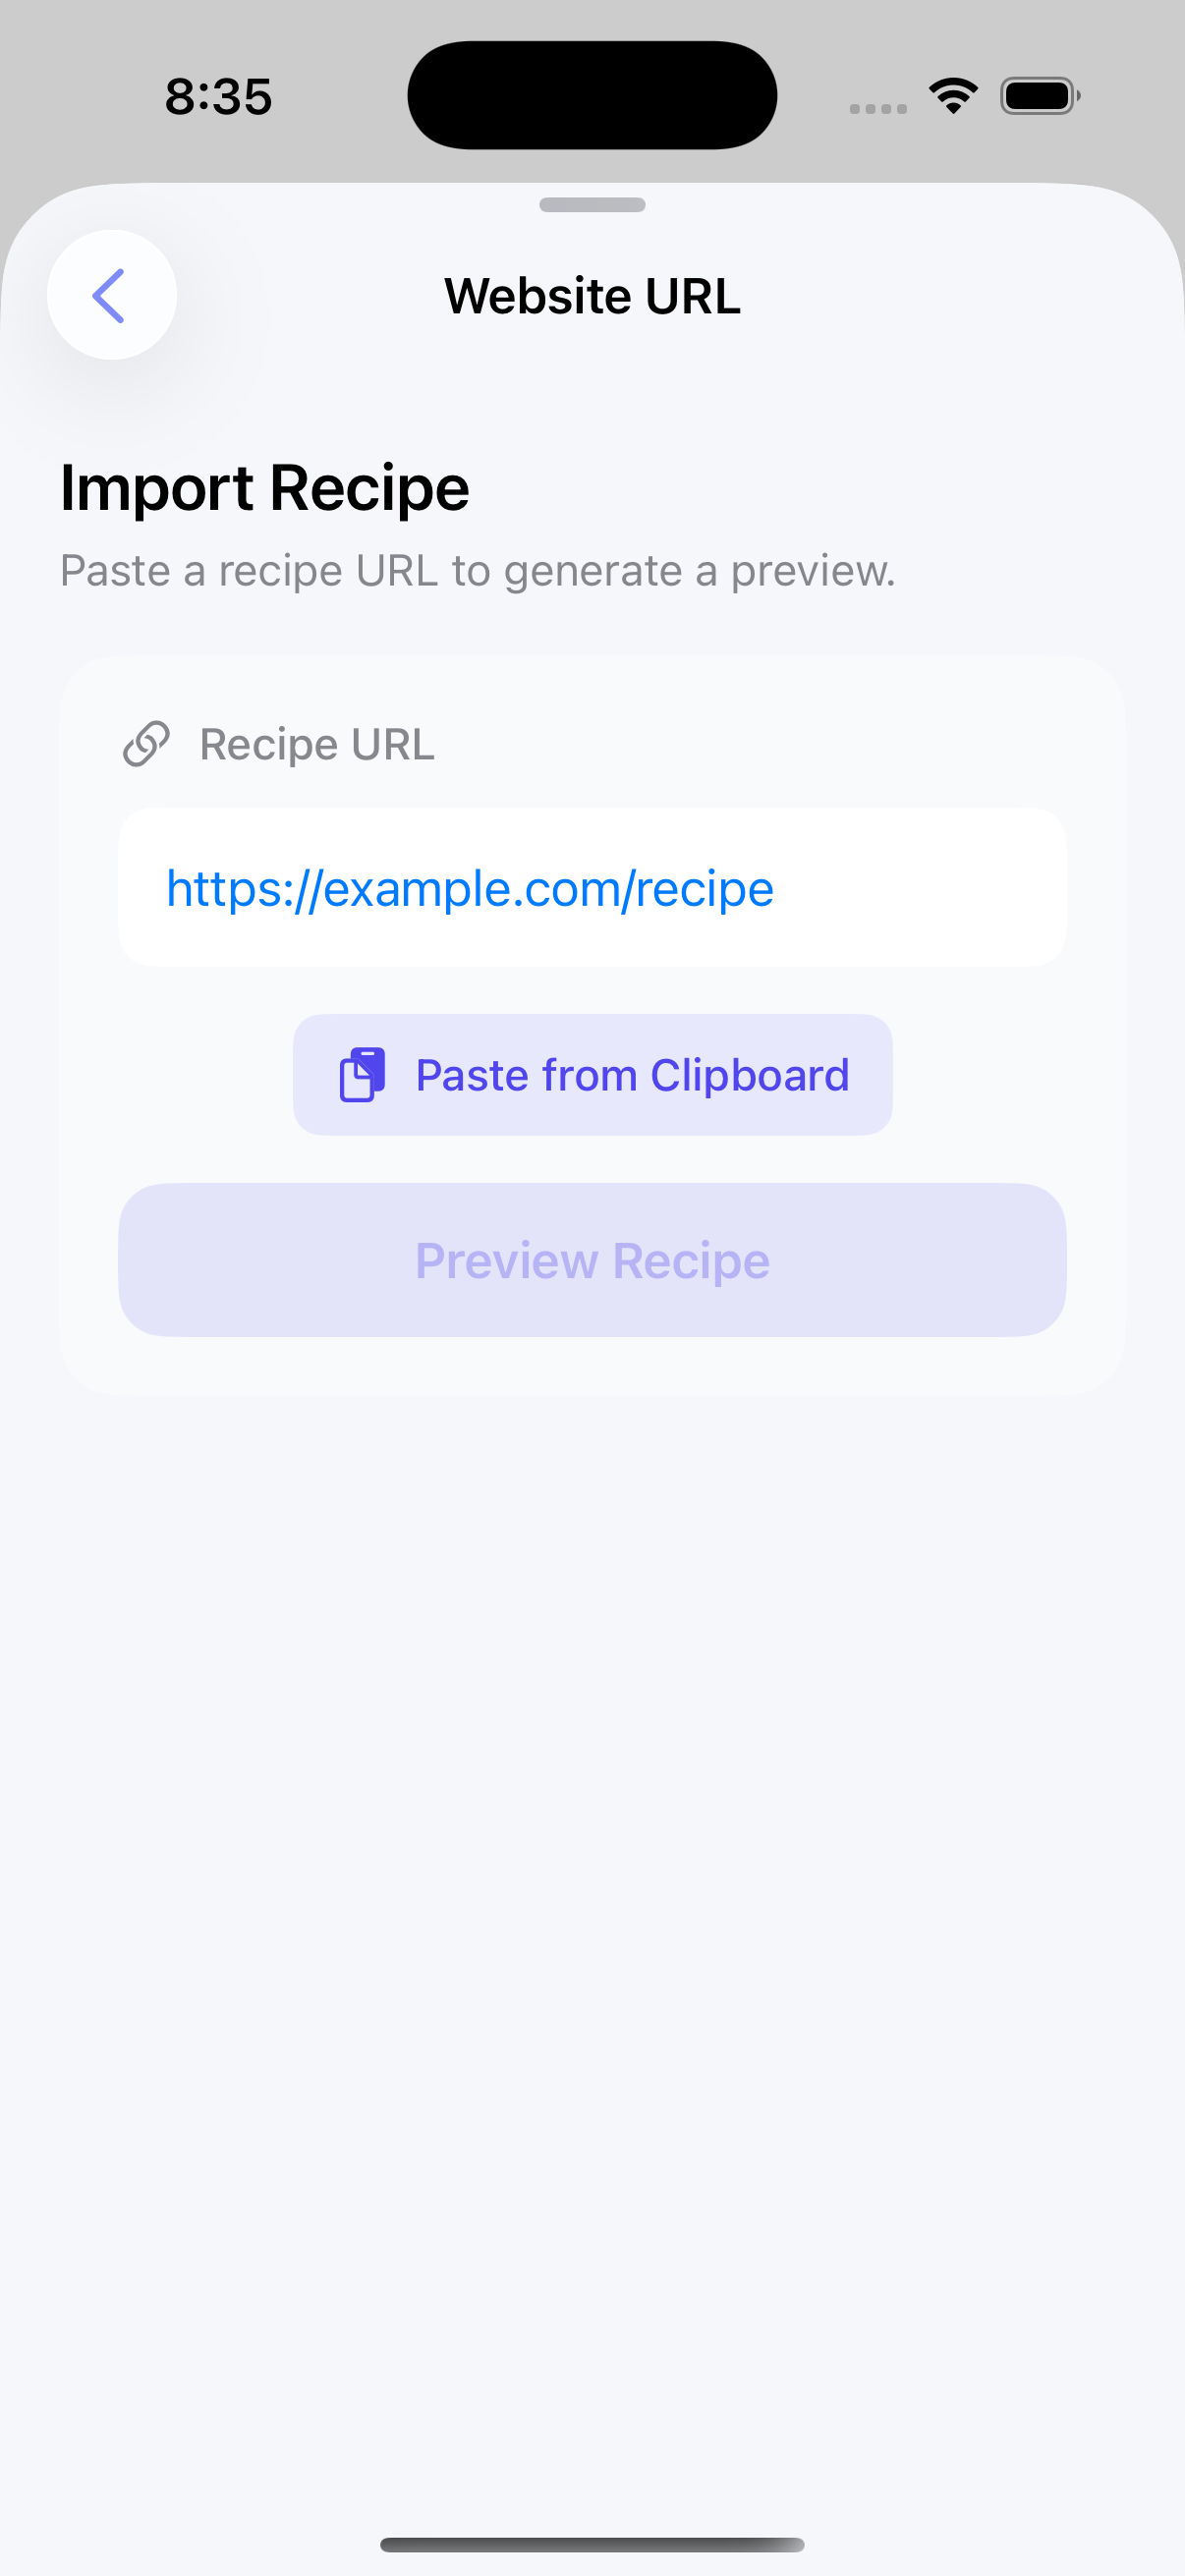
- Tap the + button in any recipe book
- Select Import from URL
- Paste the recipe URL
- Tap Import
- Review the extracted recipe and make any edits
- Tap Save to add to your collection
Supported Websites
momoChef works with thousands of recipe websites including:
- Major recipe sites (AllRecipes, Food Network, Bon Appetit, etc.)
- Food blogs and personal recipe sites
- YouTube cooking videos (extracts description recipes)
- Most sites with structured recipe data
Tip:If a URL doesn't import correctly, try the photo import method or paste the recipe text instead.
Importing from Social Media
You can also import recipes shared on social platforms:
- Instagram posts and reels
- TikTok cooking videos
- Facebook recipe posts
- YouTube videos
- Twitter/X recipe threads
Use the share extension (described below) for the best experience with social media recipes.
Share Extension
The share extension lets you import recipes without leaving Safari or other apps. This is the fastest way to save recipes while browsing.
Using the Share Extension
- In Safari (or any app with a recipe), tap the Share button
- Scroll horizontally to find momoChef
- If you don't see it, tap More and enable momoChef
- Tap momoChef to open the import preview
- Review the extracted recipe
- Select which book to save to
- Tap Save Recipe
What Gets Imported
The share extension automatically extracts:
- Recipe title
- Ingredients list
- Instructions
- Prep and cook times
- Servings
- Recipe photo (when available)
Enabling the Share Extension
If momoChef doesn't appear in your share sheet:
- Tap the Share button in any app
- Scroll to the end of the app icons and tap More
- Find momoChef in the list
- Toggle it on and tap Done
Photo Import
Scan printed recipes, cookbook pages, or handwritten recipe cards using your camera. momoChef uses advanced text recognition to extract the recipe.
Taking a Photo
- Tap the + button
- Select Import from Photo
- Choose Take Photo or Choose from Library
- Position the recipe in the frame with good lighting
- Tap the shutter button or select the photo
- Wait for processing (usually a few seconds)
Tips for Best Results
- Use good, even lighting (natural light works best)
- Hold the camera parallel to the recipe surface
- Ensure all text is in focus
- Avoid shadows and glare
- Crop to just the recipe area for better accuracy
Reviewing and Editing
After scanning, review the extracted text:
- Check that ingredients were correctly identified
- Verify instruction steps are properly separated
- Edit any text that wasn't recognized correctly
- Add missing details like prep time or servings
- Tap Save when finished
Tip:For handwritten recipes, accuracy may vary. It's helpful to compare the original photo (saved with the recipe) against the extracted text.
Text Import
Have recipe text from an email, message, or document? Paste it directly and momoChef will help format it.
Importing Text
- Copy the recipe text to your clipboard
- In momoChef, tap + and select Import from Text
- Paste the text into the input field
- Tap Analyze
- Review the parsed ingredients and instructions
- Edit as needed and tap Save
Supported Formats
The text importer recognizes various formats:
- Plain text recipes
- Recipes with numbered steps
- Ingredient lists with measurements
- Free-form recipe descriptions
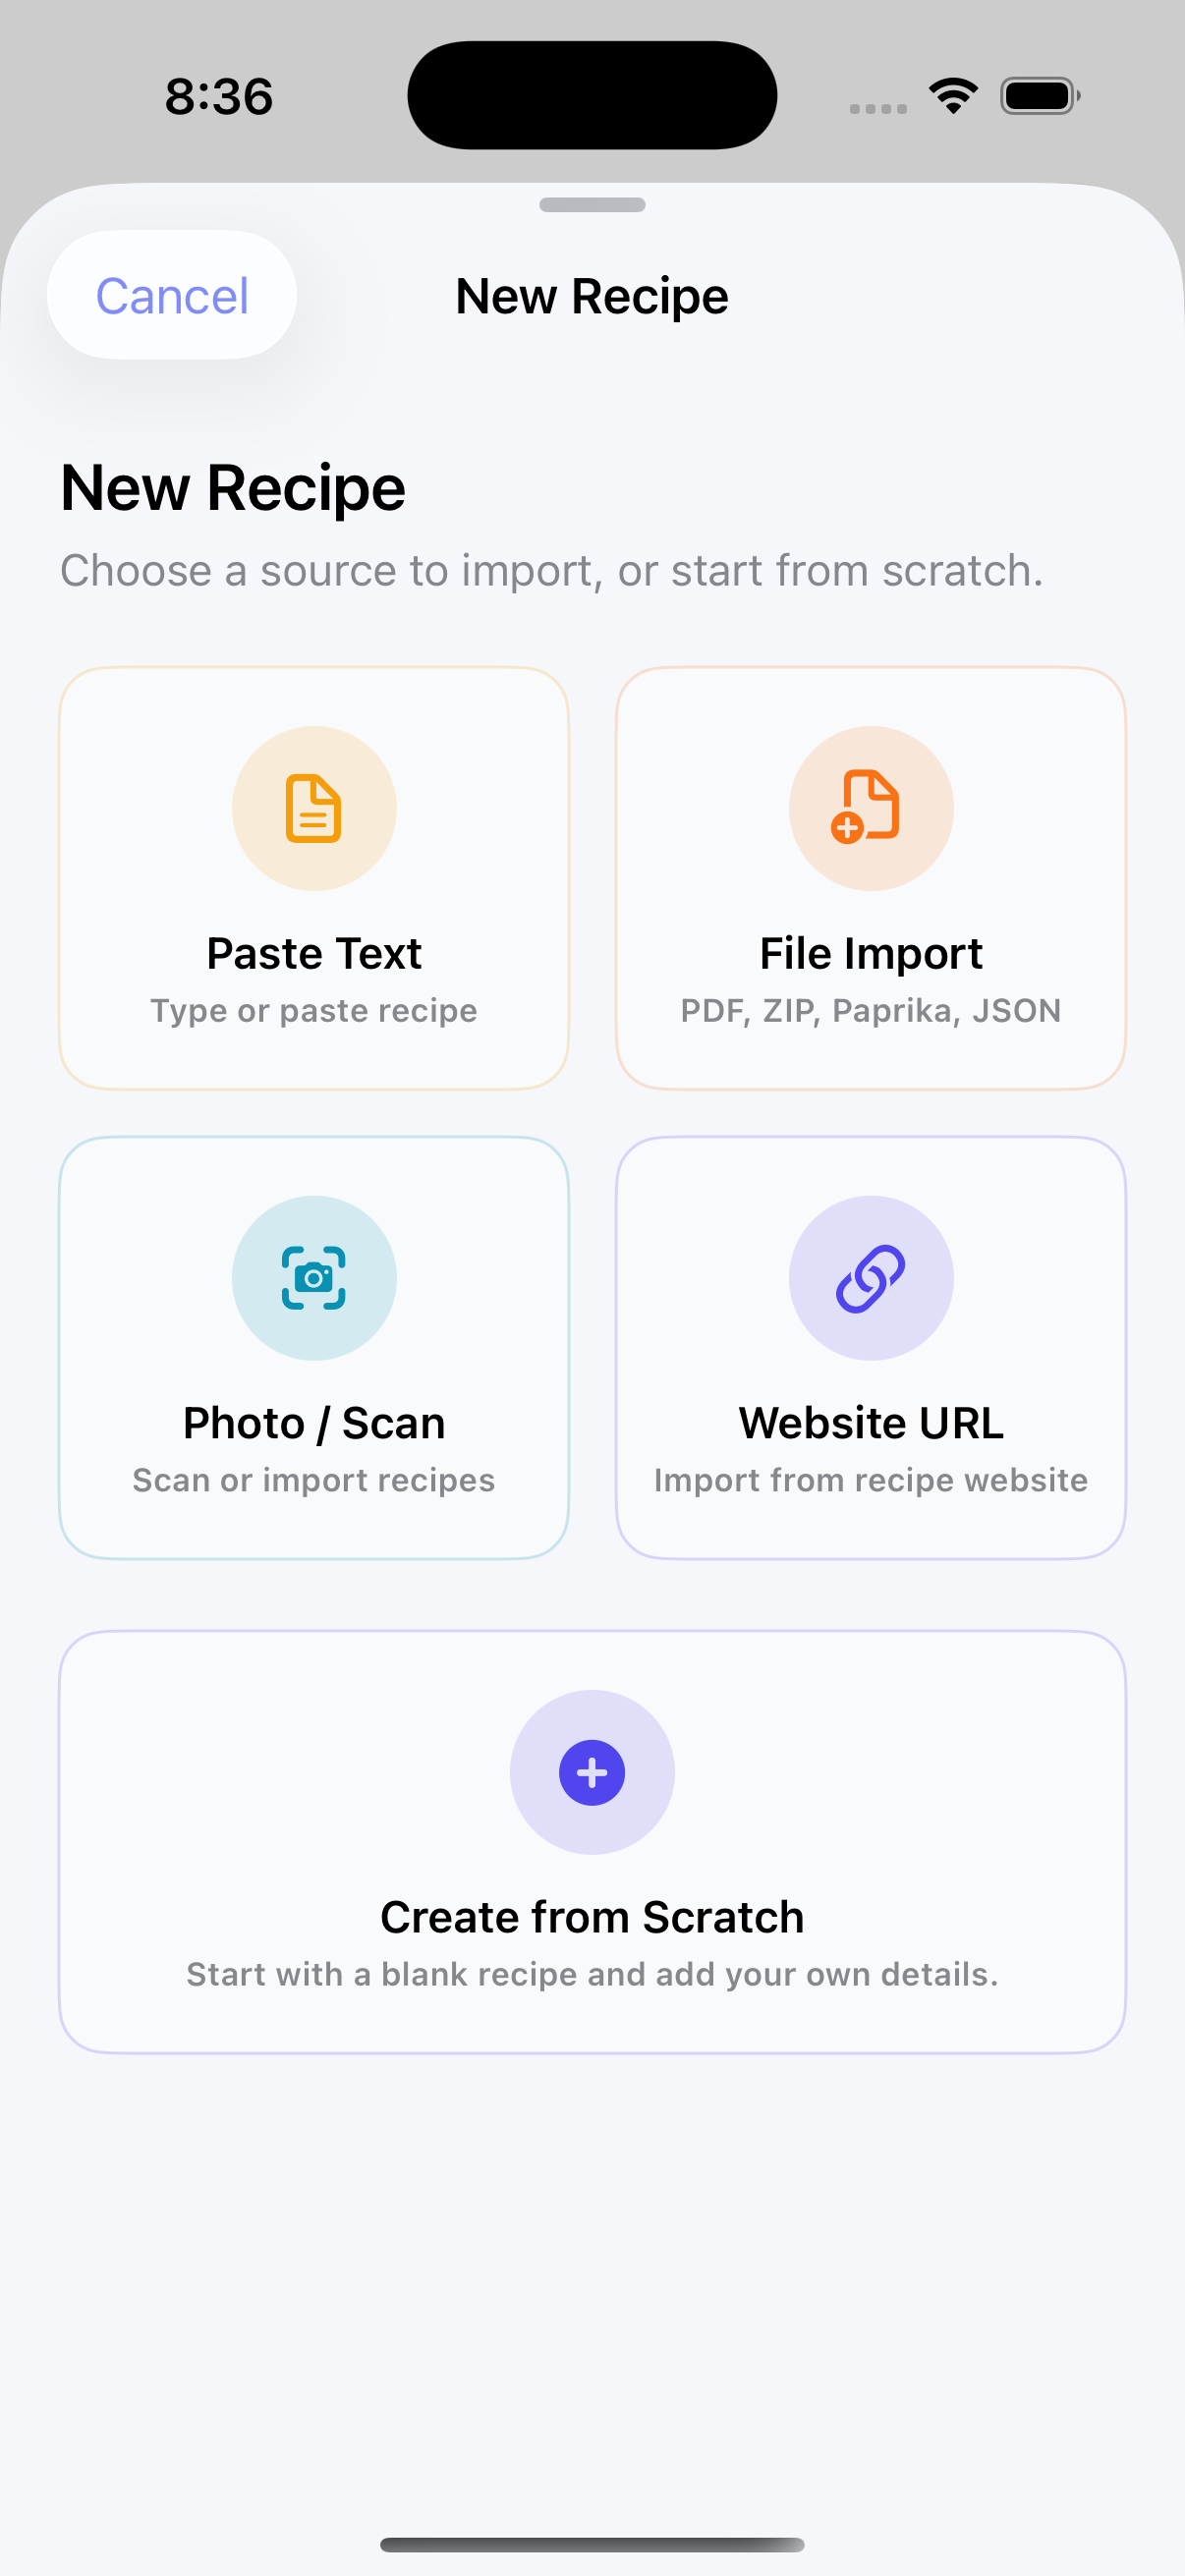
File Import
Import recipes from other apps or backup files.
Supported File Types
- JSON: momoChef export format or compatible formats
- CSV: Spreadsheet exports with recipe data
- ZIP: Bulk import with images (momoChef format)
Importing from Other Apps
momoChef can import from several popular recipe apps:
- Paprika Recipe Manager
- Copy Me That
- Recipe Keeper
- Pepperplate
- And others that support export
How to Import
- Export your recipes from the other app (check their support docs)
- Transfer the file to your iOS device (AirDrop, Files, etc.)
- In momoChef, go to Settings then Import/Export
- Tap Import from File
- Select your exported file
- Wait for processing to complete
For detailed instructions, see our Import Guide.
Bulk Import
Import multiple recipes at once using the bulk import feature.
Bulk URL Import
- Go to Settings then Import/Export
- Tap Bulk Import
- Paste multiple URLs (one per line)
- Tap Import All
- Watch progress as each recipe is imported
- Review any failures and retry if needed
Import Progress
During bulk import, you can:
- See real-time progress for each recipe
- View successful imports
- See which URLs failed and why
- Retry failed imports
- Continue in background
Tip: Bulk import works best with a stable internet connection. For large imports (50+ recipes), consider doing them in batches.
Manual Entry
Sometimes the best way is to type it yourself. Manual entry gives you complete control over your recipe.
Creating a Recipe Manually
- Tap the + button
- Select New Recipe
- Fill in the recipe details:
- Title: Recipe name (required)
- Description: Brief summary or notes
- Servings: How many people it serves
- Prep Time: Active preparation time
- Cook Time: Cooking/baking time
- Ingredients: One per line with measurements
- Instructions: Step-by-step directions
- Tags: Categories for organization
- Photo: Add from camera or library
- Tap Save when finished
Ingredient Formatting
Enter one ingredient per line. Include:
- Quantity (e.g., "2" or "1/2")
- Unit (e.g., "cups", "tablespoons", "oz")
- Item name
- Preparation notes (e.g., "chopped", "divided")
Example: 1/2 cup onion, finely chopped
Instruction Formatting
Enter one step per line or use numbered lists. momoChef will automatically separate steps for the cooking mode view.
After Import: Reviewing Recipes
After any import method, take a moment to review the recipe:
Common Edits
- Title: Simplify or correct the name
- Ingredients: Fix parsing errors, standardize units
- Instructions: Ensure steps are properly separated
- Photo: Add or replace the recipe image
- Tags: Add organizational tags
- Servings/Time: Correct if not detected
Selecting a Recipe Book
During import, you can choose which book to save the recipe to:
- Select an existing book from the list
- Create a new book inline
- Save to your default book (set in preferences)
Troubleshooting Import Issues
URL Not Recognized
If a URL fails to import:
- Make sure the page contains a recipe (not just a list of recipes)
- Try the share extension instead of paste
- Use photo import as a fallback
- Copy the text and use text import
Photo Import Inaccurate
If text recognition is poor:
- Retake the photo with better lighting
- Make sure text is in focus
- Crop to just the recipe area
- Manually correct the extracted text
Share Extension Not Working
If the share extension doesn't appear or fails:
- Make sure momoChef is enabled in the share sheet
- Restart your device
- Reinstall the app (your data is synced)
For more help, see our Troubleshooting Guide.